بسم الله الرحمن الرحيم
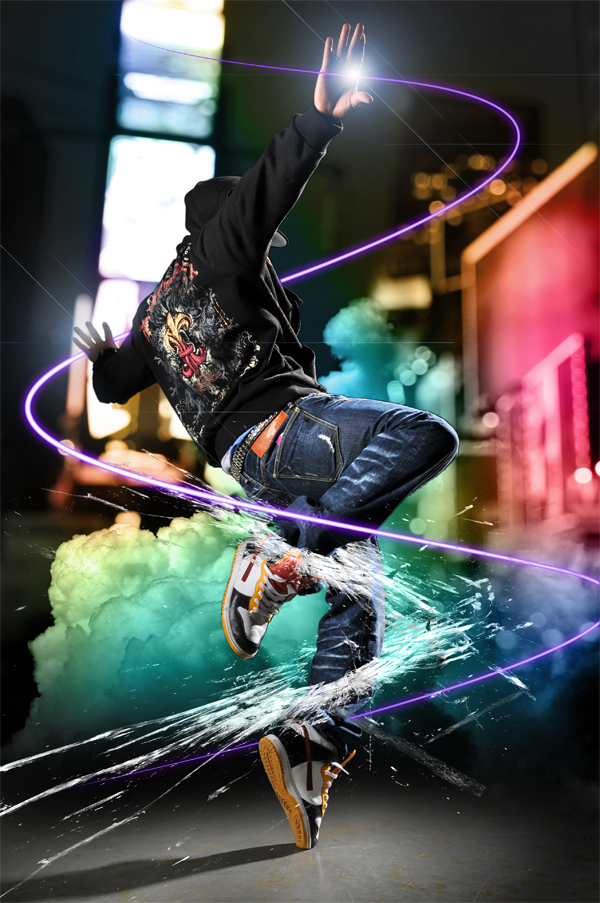
سوف نتعلم كيفية الجمع بين الصور وإضافة المؤثرات الخاصة لتحويل صورة عادية إلى عمل فني مذهل:
سوف نبدأ إنشاء الله الدرس طويل لاكنه مفيد
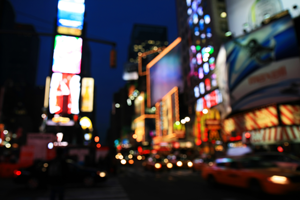
![](http://photoshoptutorials.ws/images/stories/sparklingdancephotomanipulation/image_3.png)
الصور المستعملة
![](http://photoshoptutorials.ws/images/stories/SparklingDancePhotoManipulation_FABA/image_3.png)
![](http://photoshoptutorials.ws/images/stories/SparklingDancePhotoManipulation_FABA/image.png)
![](http://photoshoptutorials.ws/images/stories/SparklingDancePhotoManipulation_FABA/image_5.png)
![](http://photoshoptutorials.ws/images/stories/SparklingDancePhotoManipulation_FABA/image_4.png)
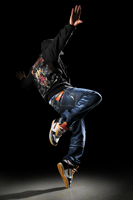
الخطوة 1: افتح صورة الراقص
تحميل صورة للراقص في فوتوشوب
![](http://photoshoptutorials.ws/images/stories/sparklingdancephotomanipulation/image_4.png)
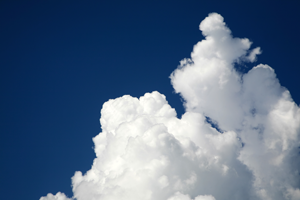
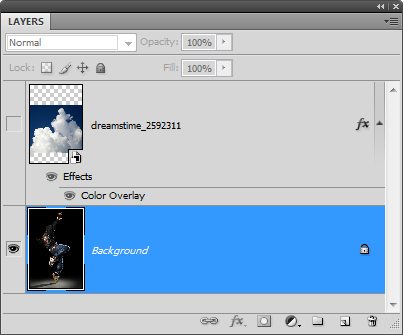
الخطوة 2 ضع صورة من الغيوم
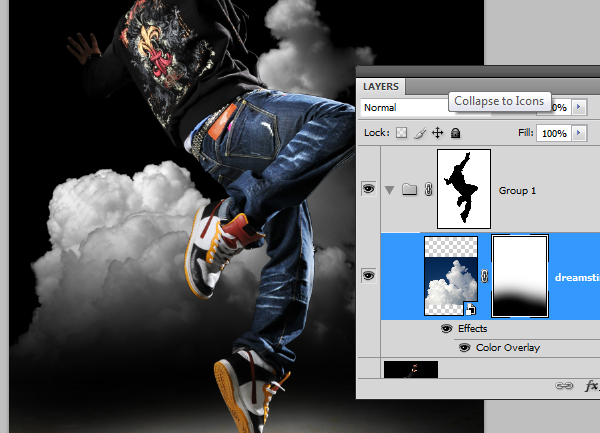
![](http://photoshoptutorials.ws/images/stories/sparklingdancephotomanipulation/image_5.png)
الخطوة 3 مزج الغيوم
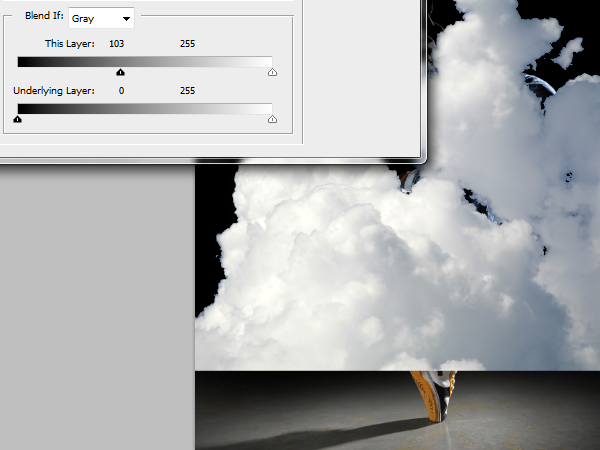
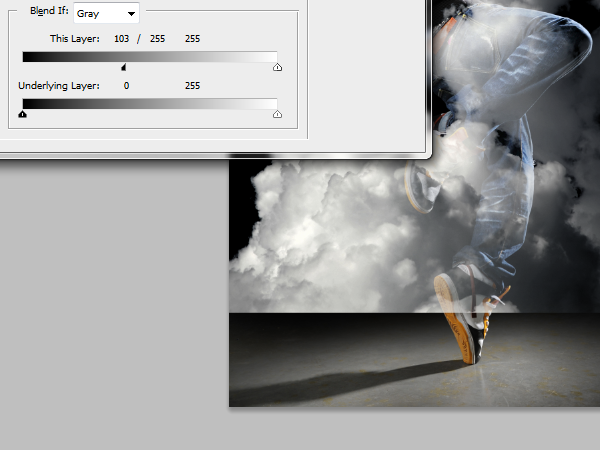
الآن سنجعل السماء شفافة بحيث فقط الغيوم مرئية. بدلا من استخدام قناع ، سنستخدم الخيارات مزج
![](http://photoshoptutorials.ws/images/stories/sparklingdancephotomanipulation/image_6.png)
في خيارات المزج ، نقل السواد ِالمنزلق نحو اليمين حتى يختفي في السماء
![](http://photoshoptutorials.ws/images/stories/sparklingdancephotomanipulation/image_7.png)
الاستمرار في الضغط على ALT وسحب سواد ِالمنزلق نحو اليمين. و ينبغي أن يكون هناك قدر من الشفافية. لا تنقر فوق موافق بعد.
![](http://photoshoptutorials.ws/images/stories/sparklingdancephotomanipulation/image_8.png)
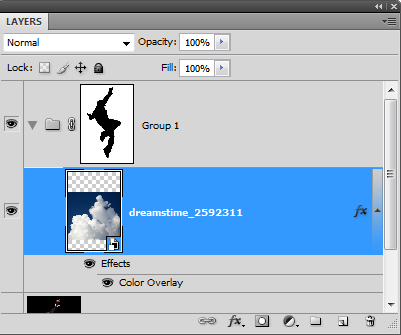
في نفس الطبقة ، وانقر على Color Overlay option. اختيار الأبيض كلون ثم تعيين وضع مزيج من الألوان.
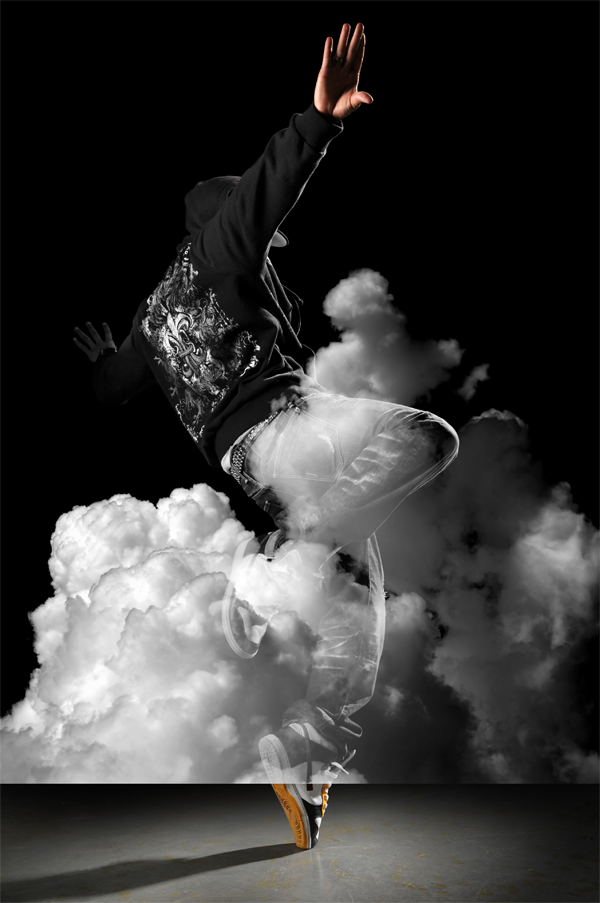
![](http://photoshoptutorials.ws/images/stories/sparklingdancephotomanipulation/image_9.png)
وتصبح الصورة هكذا
![](http://photoshoptutorials.ws/images/stories/sparklingdancephotomanipulation/image_10.png)
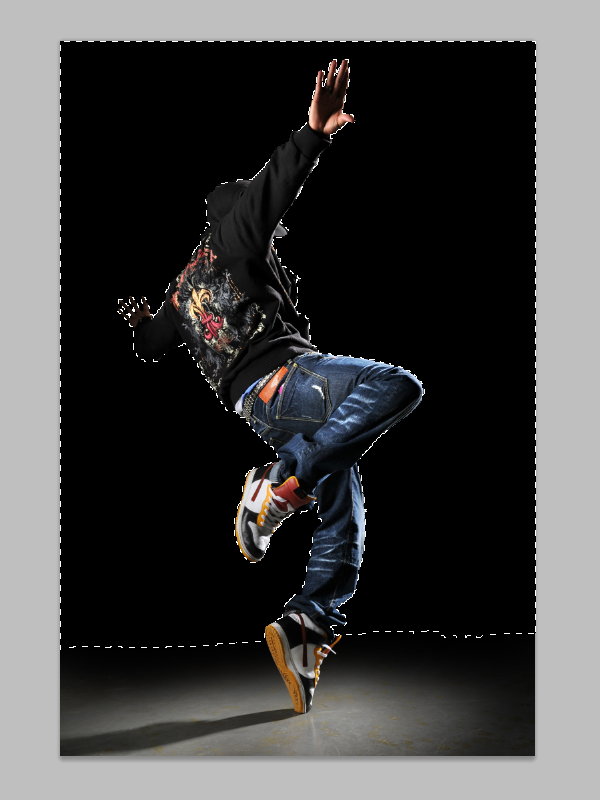
الخطوة 4 إنشاء اختيار النموذج معكوس
إخفاء طبقة الغيوم ثم حدد طبقة الخلفية
![](http://photoshoptutorials.ws/images/stories/sparklingdancephotomanipulation/image_11.png)
حدد العصا السحرية
![](http://photoshoptutorials.ws/images/stories/sparklingdancephotomanipulation/image_12.png)
انقر على المنطقة السوداء لإنشاء مجموعة مختارة من الخلفية. ستحصل على أكثر من خلفية محددة
![](http://photoshoptutorials.ws/images/stories/sparklingdancephotomanipulation/image_13.png)
يمكنك الاستمرار في إضافة التحديد باستخدام the lasso tool
![](http://photoshoptutorials.ws/images/stories/sparklingdancephotomanipulation/image_14.png)
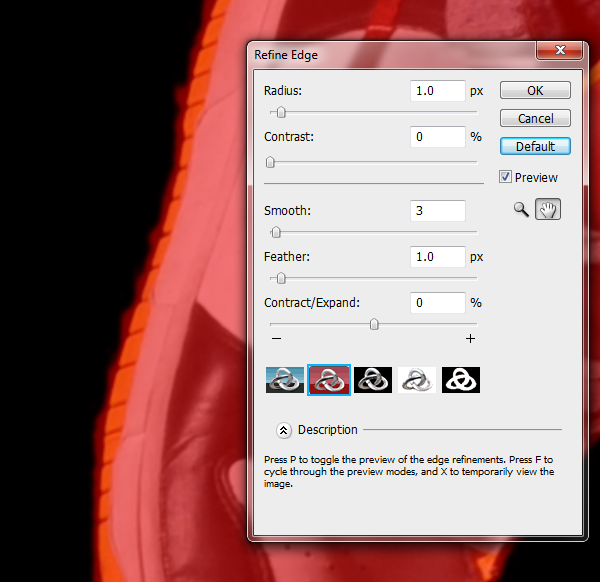
يمكنك استخدام أداة صقل الحافة لتعزيز عمليات الاختيار
![](http://photoshoptutorials.ws/images/stories/sparklingdancephotomanipulation/image_15.png)
![](http://photoshoptutorials.ws/images/stories/sparklingdancephotomanipulation/image_16.png)
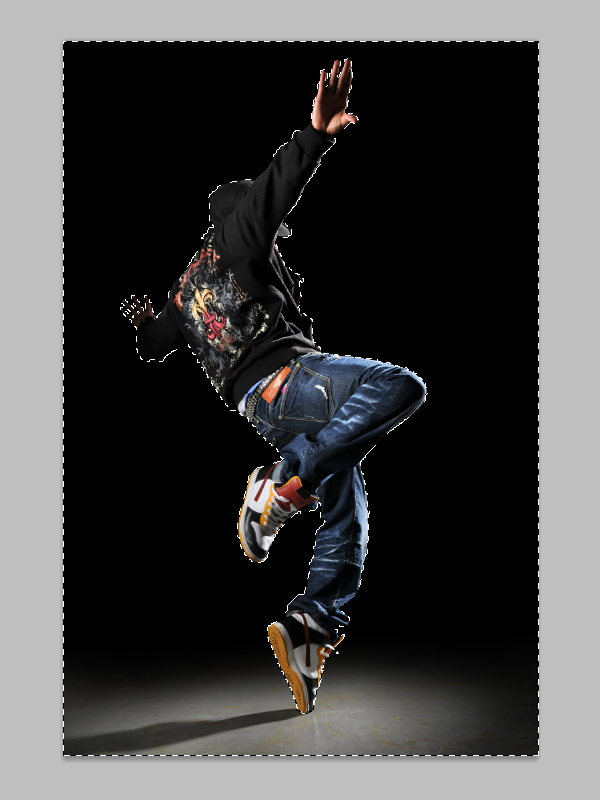
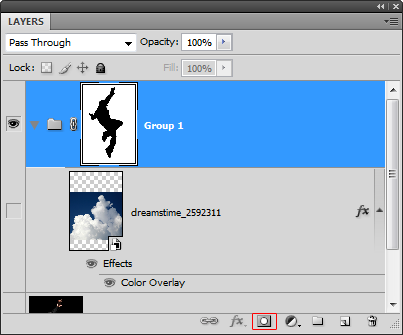
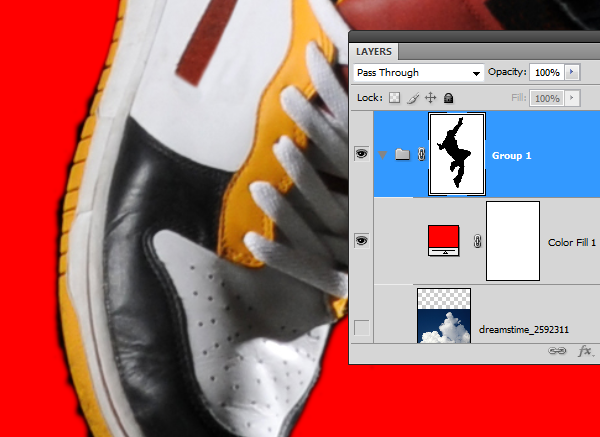
الخطوة 5 اصنع قناعا شفافا للاختياره على المجموعة
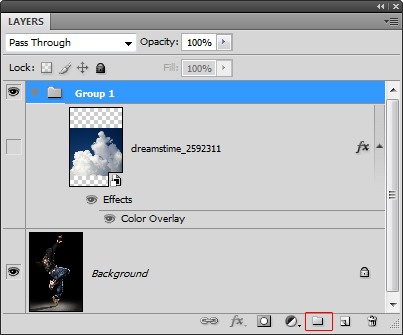
انقر على زر
في لوحة الطبقات
![](http://photoshoptutorials.ws/images/stories/sparklingdancephotomanipulation/image_18.png)
انقر على زر
لإضافة قناعا شفافا
![](http://photoshoptutorials.ws/images/stories/sparklingdancephotomanipulation/image_20.png)
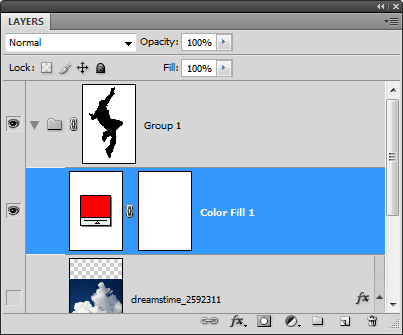
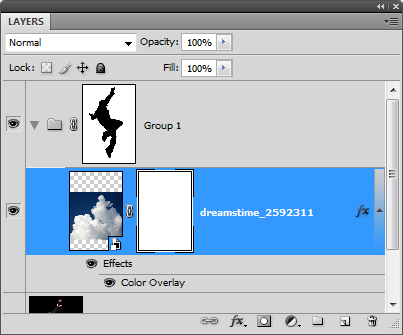
إضافة لون الطبقة بلون أحمر. للقيام بذلك ، حدد طبقة الغيوم ثم اخترLayer > New Fill Layer > Solid Color
![](http://photoshoptutorials.ws/images/stories/sparklingdancephotomanipulation/image_21.png)
الخطوة 6 صقل القناع
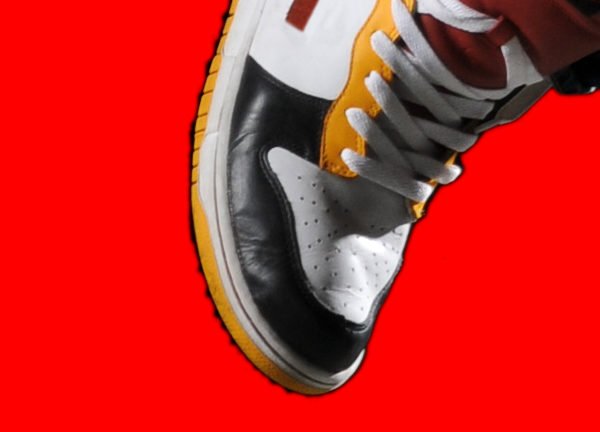
تكبير إلى 100 ٪ نظرا للعثور على أي عيوب مثل هذا واحد على الأحذية
![](http://photoshoptutorials.ws/images/stories/sparklingdancephotomanipulation/image_22.png)
حدد قناع الطبقة في لوحة طبقة ثم استخدام الفرشاة والممحاة لصقل الحواف
![](http://photoshoptutorials.ws/images/stories/sparklingdancephotomanipulation/image_23.png)
عند الانتهاء من صقل القناع ، يمكنك حذف لون التعبئة وجعل طبقة طبقة الغيوم مرئية
![](http://photoshoptutorials.ws/images/stories/sparklingdancephotomanipulation/image_24.png)
الخطوة 7 تكملة المزج بين الغيوم
أضافة قناع على طبقة الغيوم. للقيام بذلك ، حدد الطبقة ثم اخترLayer > Layer Mask > Reveal All.
![](http://photoshoptutorials.ws/images/stories/sparklingdancephotomanipulation/image_25.png)
حدد أداة ممحاة
![](http://photoshoptutorials.ws/images/stories/sparklingdancephotomanipulation/image_26.png)
تأكد من أن قناع طبقة السحب محددا
![](http://photoshoptutorials.ws/images/stories/sparklingdancephotomanipulation/image_27.png)
حدد أداة تحرك ثم تحرك الغيوم أقل بحيث يكون أعلى بقليل من الضوء